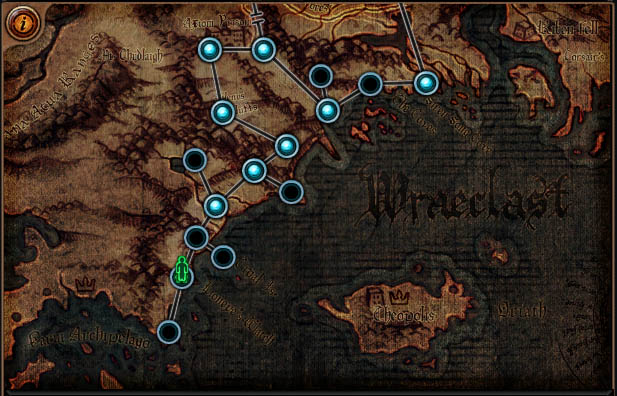
Wraeclast to prastary kontynent pełen tajemnic, na który nasza postać została zesłana z wyspy Oriath.
Nie wszystkie obszary posiadają punkt nawigacyjny (waypoint)! Można to sprawdzić na mapie świata (pojawia się po wciśnięciu klawisza U):
- puste kółko – brak punktu nawigacyjnego;
- mała kropka w kółku – obszar posiada punkt nawigacyjny, ale gracz go nie aktywował;
- duża kropka – aktywny punkt nawigacyjny.
Legenda:
 – Punkt nawigacyjny
 – Trial of Ascendancy
 – Obozowisko
- W nawiasach podano obszary usunięte z gry lub poprzednie nazwy nowych.

- The Twilight Strand
 Lioneye’s Watch (Shore Encampment)
 The Coast (The Terraces)
- The Tidal Island
- The Mud Flats
- The Fetid Pool
 The Submerged Passage (Lower i Upper Submerged Passage, Tidal Passage)
- The Flooded Depths
 The Ledge
 The Climb (Rocky Climb)
 The Lower Prison
- The Upper Prison
 Prisoner’s Gate
 The Ship Graveyard
- (The Coves)
 Cavern of Wrath
- Cavern of Anger
 The Southern Forest
 The Forest Encampment
- The Old Fields
- The Den
 The Crossroads
- The Fellshrine Ruins

 The Crypt Level 1
- The Crypt Level 2
 The Broken Bridge
 The Chamber of Sins Level 1
 The Chamber of Sins Level 2
 The Riverways
 The Western Forest
- The Weaver’s Chambers
 The Wetlands
- The Vaal Ruins
 The Northern Forest
- The Dread Thicket
 The Caverns
- The Ancient Pyramid
 The City of Sarn
 The Sarn Encampment
- The Slums

 The Crematorium
 The Sewers
- The Marketplace
 The Catacombs
 The Battlefront
 The Solaris Temple Level 1
 The Solaris Temple Level 2
 The Eternal Laboratory
 The Docks
 The Ebony Barracks
 The Lunaris Temple Level 1
- The Lunaris Temple Level 2
 The Imperial Gardens
 The Hedge Maze
 The Library
- The Archives
 The Sceptre of God
- The Upper Sceptre of God
 The Aqueduct
 Highgate
- The Dried Lake
- The Mines Level 1
- The Mines Level 2
 The Crystal Veins
- Kaom’s Dream
 Kaom’s Stronghold
- Daresso’s Dream
 The Grand Arena
- The Belly of the Beast Level 1
- The Belly of the Beast Level 2
 The Harvest
- The Ascent
 The Slave Pens
 Overseer’s Tower
- The Control Blocks
 Oriath Square
- The Templar Courts
 The Chamber of Innocence
- The Torched Courts
 The Ruined Square
- The Ossuary
 The Reliquary
 The Cathedral Rooftop
 Lioneye’s Watch
- The Twilight Strand
 The Coast
- The Tidal Island
- The Mud Flats
- The Karui Fortress
 The Ridge
 The Lower Prison
- Shavronne’s Tower
 Prisoner’s Gate
 The Western Forest
 The Riverways
- The Wetlands
 The Southern Forest
- The Cavern of Anger
 The Beacon
 The Brine King’s Reef
 The Bridge Encampment
- The Broken Bridge
 The Crossroads
- The Fellshrine Ruins

 The Crypt
 The Chamber of Sins Level 1
- Maligaro’s Sanctum
 The Chamber of Sins Level 2
 The Den
 The Ashen Fields
 The Northern Forest
- The Dread Thicket
 The Causeway
 The Vaal City
- The Temple of Decay Level 1
- The Temple of Decay Level 2
 The Sarn Ramparts
 The Sarn Encampment
 The Toxic Conduits
- Doedre’s Cesspool
- The Grand Promenade

 The Bath House
- The High Gardens
 The Ebony Barracks
 The Lunaris Temple Level 1
- The Lunaris Temple Level 2
- The Quay
 The Grain Gate
 The Imperial Fields
 The Solaris Temple Level 1
- The Solaris Temple Level 2
 The Battlefront
- The Harbour Bridge
 The Blood Aqueduct
 Highgate
- The Descent
 The Vastiri Desert
 The Oasis
 The Foothills
- The Boiling Lake

 The Tunnel
 The Quarry
- The Refinery
- The Belly of the Beast
- The Rotting Core
 Oriath Docks
- The Cathedral Rooftop
 The Ravaged Square
 The Reliquary
 The Ossuary
- The Torched Courts
 The Desecrated Chambers
- The Canals
- The Feeding Trough
 Oriath
 The Templar Laboratory


